You know the drill. Lasso the face. Paste it on a new layer. Free Transform, Warp, nudge, nudge again. Load the selection, contract five pixels, Auto-Blend, then fight Curves for twenty minutes because the skin went red, then grey, then red again.
Two hours later you zoom to 100% and there it is: the hard edge along the jaw, the mismatched lighting, the dead stare. A sticker on a photo. Everybody can tell.
Here is the thing nobody says out loud. In 2026, the pros are not doing it that way anymore. The hard 90% (skin tone, lighting, a believable seam) gets handed to an AI model in one step. Photoshop only does the fun 10% at the end.
To prove it, I picked the most unforgiving base image I could think of: the most famous face in art history. Here is how to run a proper photoshop face swap on Girl with a Pearl Earring, keep the oil-paint look, and then make her blink.
Key takeaways
- The classic manual method is roughly 10 steps and 30 minutes to 2 hours per face, and skin tone plus lighting are where it falls apart.
- Photoshop's own Generative Fill and Firefly cannot swap in a specific person's face from a photo you provide. That is by design.
- The 2026 workflow is a hybrid: one AI model fuses the new face in seconds and keeps the source material's texture, then Photoshop does the polish.
- For straight photo swaps, Atlas Cloud's free Swap Face tool does the whole job at no charge, with no usage cap and no watermark per its own FAQ.
- The finished still can become a living-portrait video and a shareable GIF without touching a timeline.
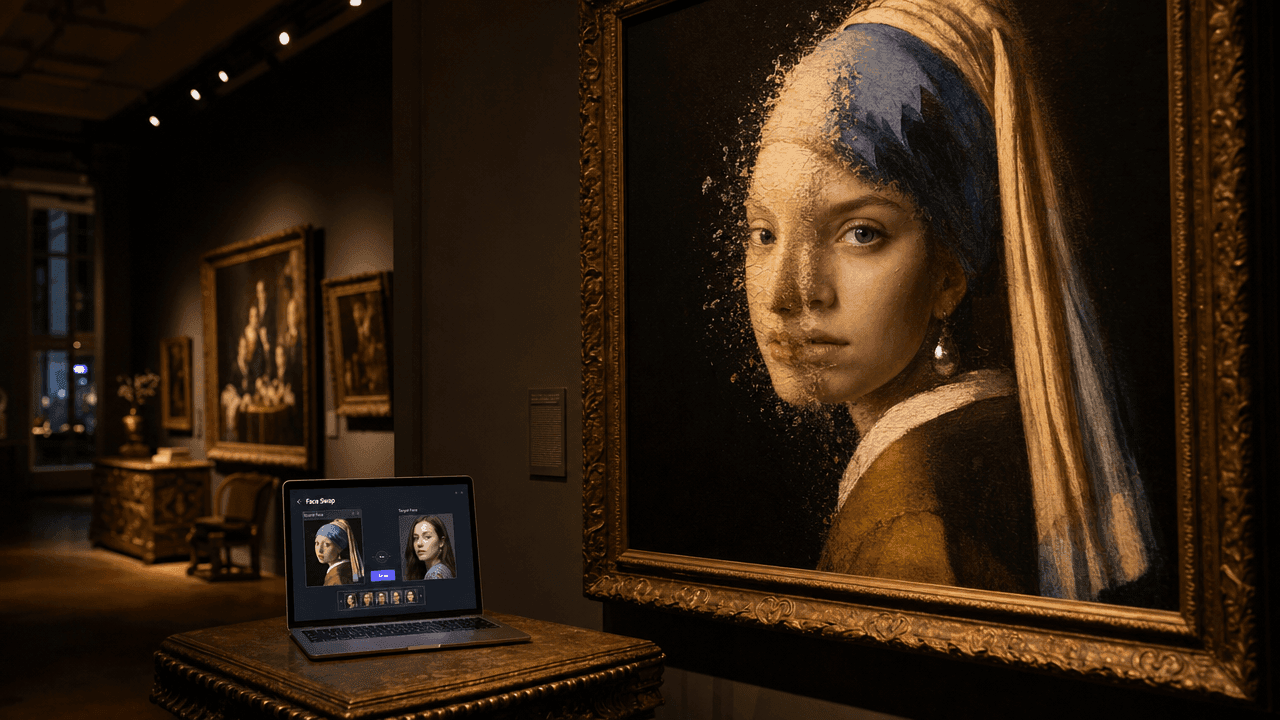 A gallery lit warmly at night: a classical oil portrait on the wall whose painted face is half-dissolving into a modern human face, a laptop open on a side table showing a face-swap interface
See It First: A Photoshop Face Swap That Started as a 400-Year-Old Painting
Before any theory, here is the payoff. Left is Johannes Vermeer's original Girl with a Pearl Earring (1665, public domain). Right is the same painting after the face swap. New person, same brushstrokes, same soft light from the left, same craquelure in the varnish. 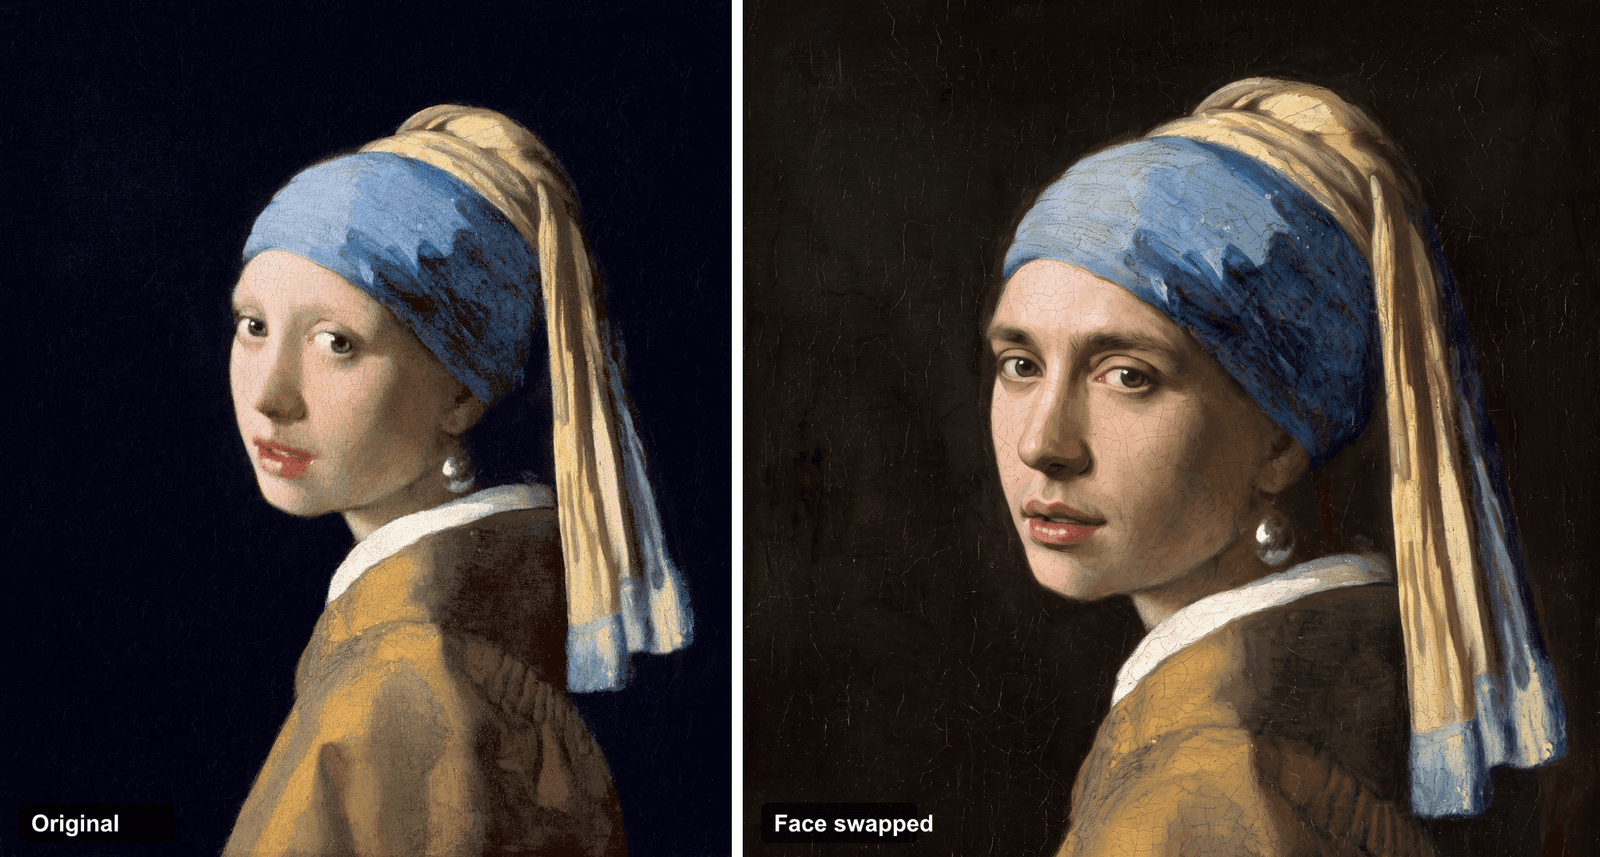 Before and after: on the left the original Vermeer painting, on the right the same painting with a different person's face fused in while keeping the oil-paint texture
That face on the right is not the girl in the original painting. It is a completely different person. But it does not read as a paste job, because the face was re-rendered inside the painting's style instead of dropped on top of it. That difference, fusion versus paste, is the whole game. Keep reading and you can reproduce this exact result.
Why Face Swap in Photoshop Is Still So Hard
The manual method is not a mystery. The canonical version, taught by Jesús Ramirez, goes like this: Lasso the source face, paste it over the target, Free Transform and Warp to line up the eyes and mouth, add a layer mask, load the body layer as a selection, contract it by about 5 pixels, then run Edit ▸ Auto-Blend Layers with Seamless Tones and Colors checked, and finally clean up with Curves, Selective Color and a bit of dodge and burn (Photoshop Training Channel, 2024).
It works. It also breaks in the same three places every time.
- Skin tone. Match Color and Curves get you close, then the face reads slightly red, or slightly grey, and no slider quite fixes it. One long-running Adobe forum thread on the topic is literally titled "nothing works as advertised."
- Lighting. If the light in the source face comes from a different direction than the target, the brain flags it instantly. People describe the output as looking "like a mask, not a face."
- The eyes. A dead, glassy stare is the fastest way to land in the uncanny valley, and it takes real dodge-and-burn skill to fix.
There is also a limit people run into and assume they are doing something wrong. Photoshop's Generative Fill and Firefly can regenerate a face, but they cannot swap in a specific person's face from a photo you hand them. Firefly only generates from Adobe's own trained material, so "replace this face with my friend's face from this other picture" is not something it will do (Adobe Community, 2023). That single limitation is why so many people go looking for a different model. 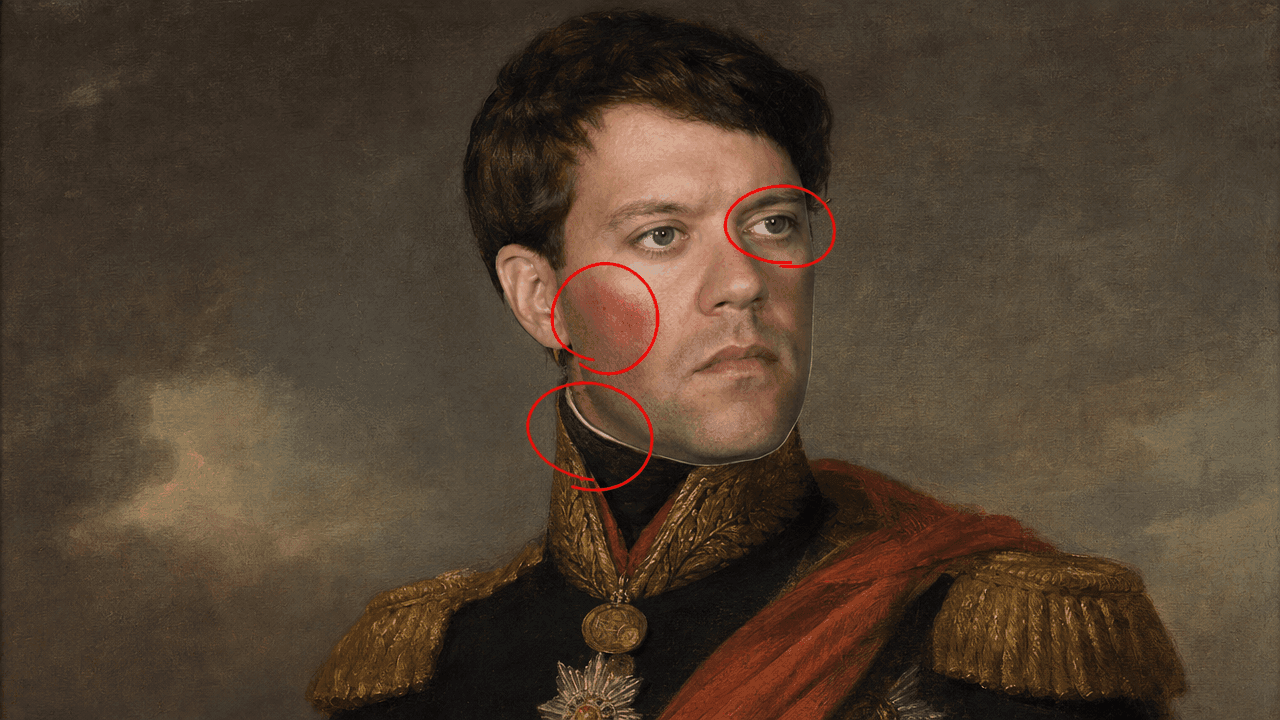 An obviously bad manual face swap example, with a mismatched skin-tone patch, a hard cut-out edge along the jaw, and a flat lifeless stare, marked with red callouts
A Faster Photoshop Face Swap Workflow (AI + Photoshop)
Here is the shift. Instead of doing the fusion by hand, you let a modern image-editing model do it, then you finish in Photoshop.
This is not a fringe idea. As of 2025, Photoshop's own Generative Fill can already call third-party models like Google's Nano Banana and Flux instead of Firefly, because Adobe knows those models are better at certain jobs (Digital Camera World, 2025). The catch is that the in-app version is throttled and still will not take your reference face. So the practical move is to run the same class of model directly, at full resolution, with your own two images, in one browser tab.
That is where Atlas Cloud comes in. Two lanes matter here. The model playgrounds run the exact models Photoshop reaches for (Nano Banana 2 for the edit, plus image-to-video models) without the app's limits, and they take your own reference photo. And the AI tools hub collects free-to-run utilities, including the free Swap Face tool this article gets to below. The whole chain happens in one tab: fuse the face, then animate the result.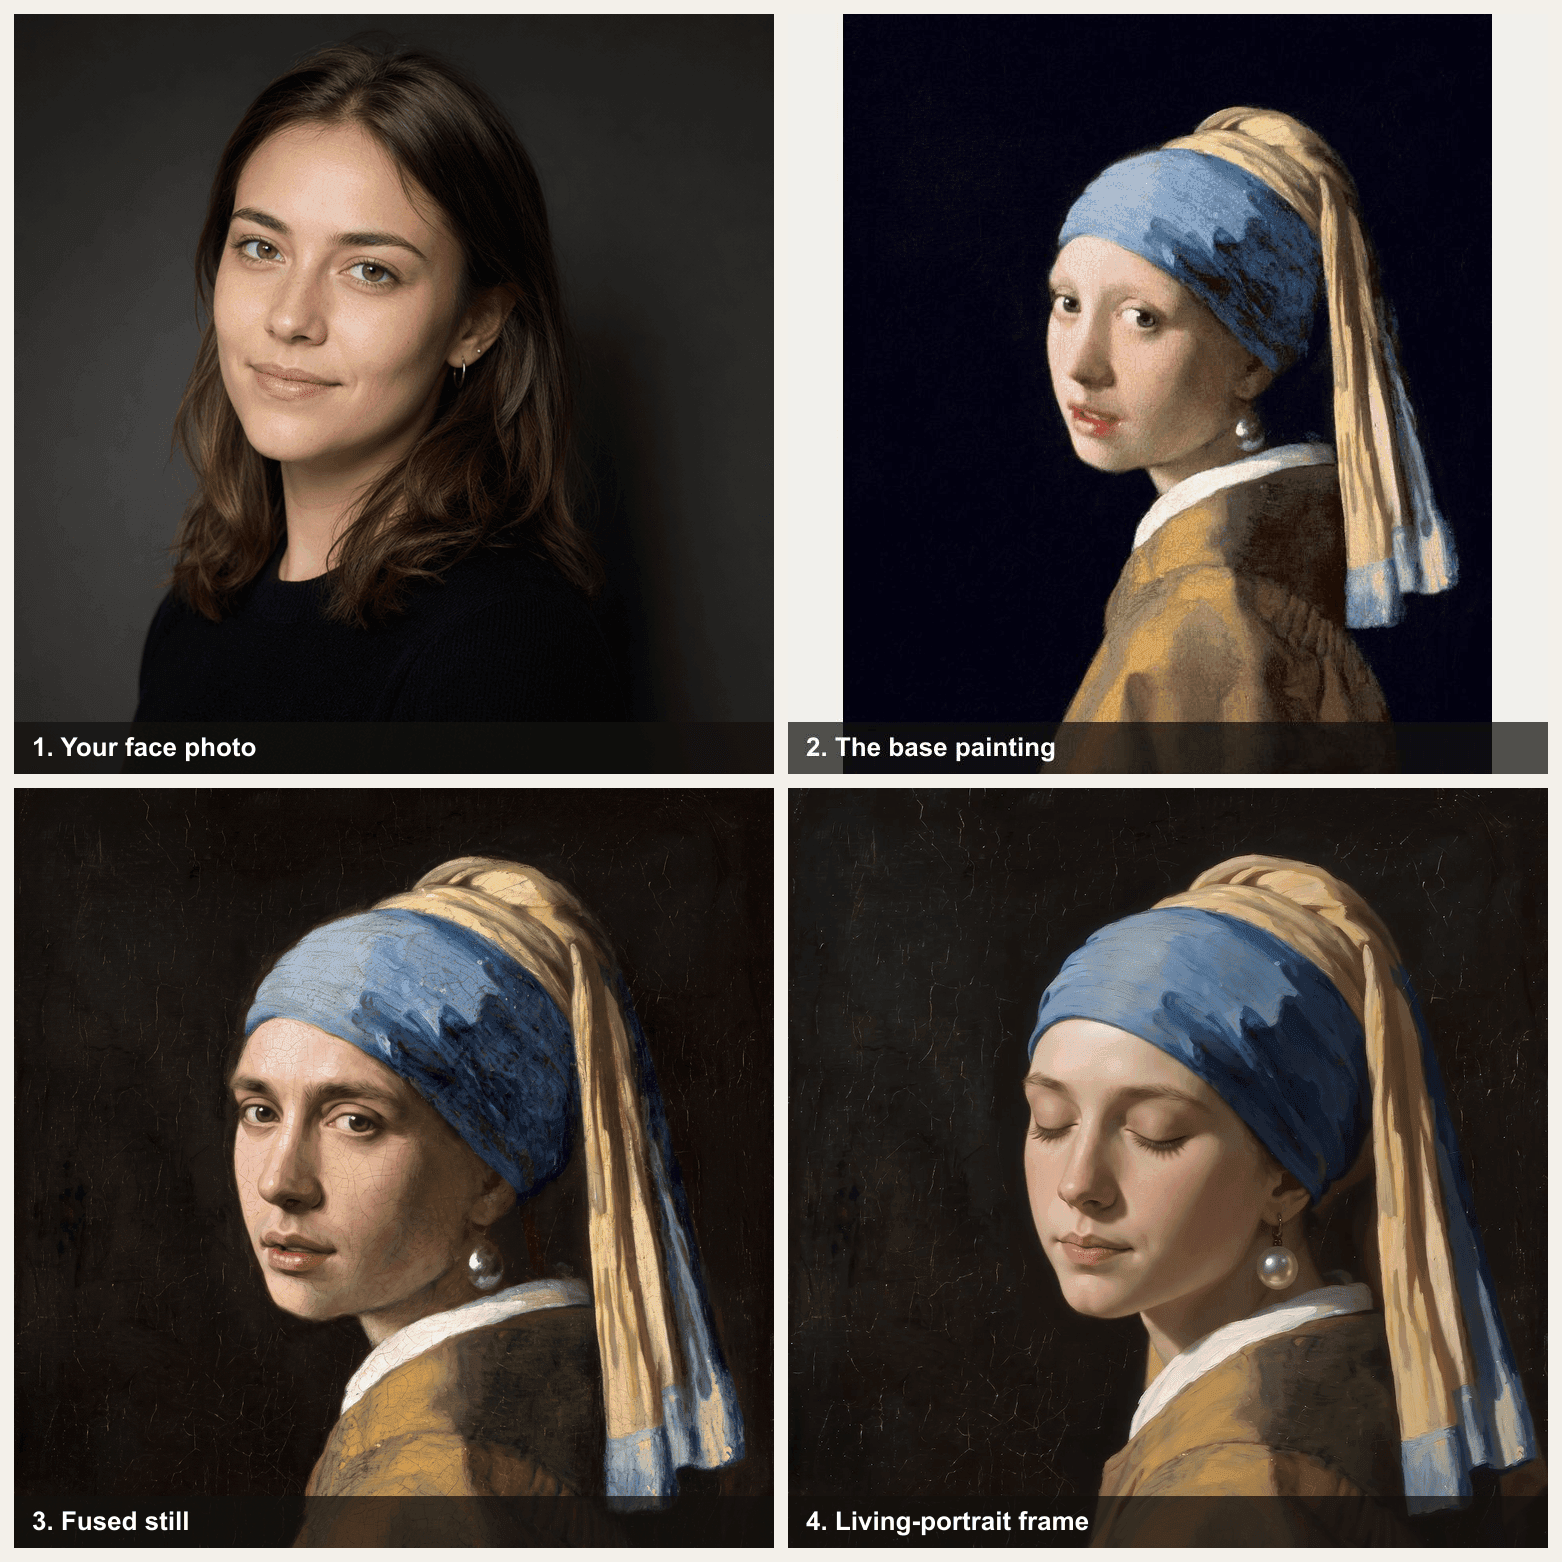 A two-by-two workflow grid: your face photo, the original Vermeer painting, the fused still, and one frame from the finished living-portrait video
Two jobs, two models. Here is what each one does and what it costs.
| Step | Model | Job | Price (prod, July 2026) |
|---|---|---|---|
| Fuse the face | google/nano-banana-2/edit | Blend the new face into the painting, keep the brushstrokes | $0.08 (1K) / $0.12 (2K) / $0.16 (4K); Developer tier $0.04 |
| Bring it to life | bytedance/seedance-2.0-mini/image-to-video | Turn the still into a 5s video | ~$0.43 for 5s at 720p (30% off, as of Aug 2026; list price $0.61) |
How to Face Swap in Photoshop, Step by Step
This is the full chain, start to finish, using one showcase image. Every prompt below is copy-paste ready.
Step 1: Prep your two images in Photoshop. Download the base you want to swap into. For this demo it is the public-domain Vermeer from Wikimedia Commons. Then pick your face photo. A front-ish angle with soft, even light works best, ideally lit from roughly the same side as the painting (here, the left). In Photoshop, crop out clutter, straighten both images, and get them to a similar resolution. No AI yet, this is just housekeeping so the fusion has clean input. 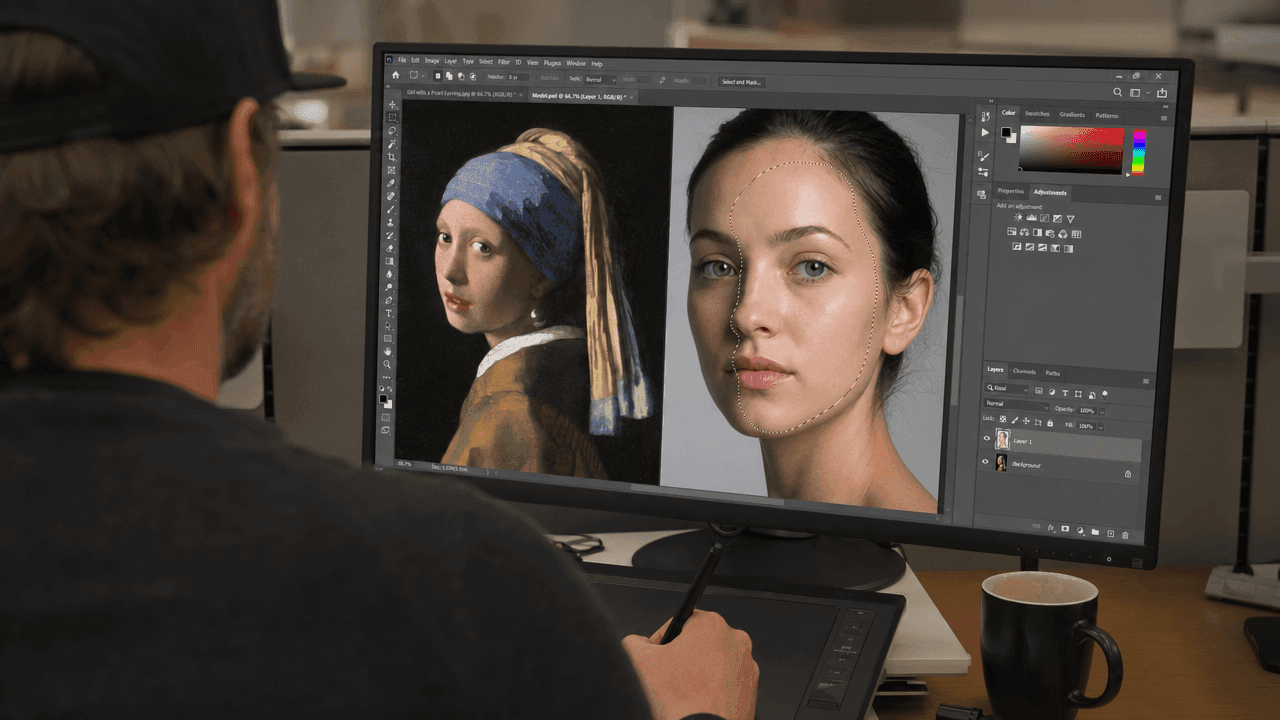 A Photoshop workspace with the Vermeer painting and a separate portrait photo open side by side, lasso and crop tools visible (illustrative)
Step 2: Do the hard part with one AI fusion. Open the google/nano-banana-2/edit model, load two reference images (Image 1 = the painting, Image 2 = your face), set the resolution to 2K, and match the output ratio to the painting. Paste this exact prompt:
plaintext1Image 1 is a classic 17th-century Dutch oil painting: a young figure against a 2dark background, wearing a blue-and-gold headscarf and a large pearl earring, 3lit softly from the left, rendered in visible oil brushstrokes with fine 4craquelure. Image 2 is a photo of a person's face. Perform a complete face 5swap: replace the painting's face with the face and identity of the person in 6Image 2. This identity change is required, do not keep the original face. 7Re-render the new face fully in the same oil-painting style: same soft left 8lighting, same warm skin palette, same visible brushstrokes, canvas texture and 9craquelure, the same slight head-turn and direct gaze. Keep the headscarf, pearl 10earring, dark background, framing and painterly grain exactly unchanged. The face 11must stay realistically human.
Settings: resolution 2K, two reference images, ratio matched to the painting. Nano Banana can vary between runs, so if the first output loses the brushstrokes or drifts off the pose, run it again. You are done when the swapped face is clearly a different person but still looks hand-painted. 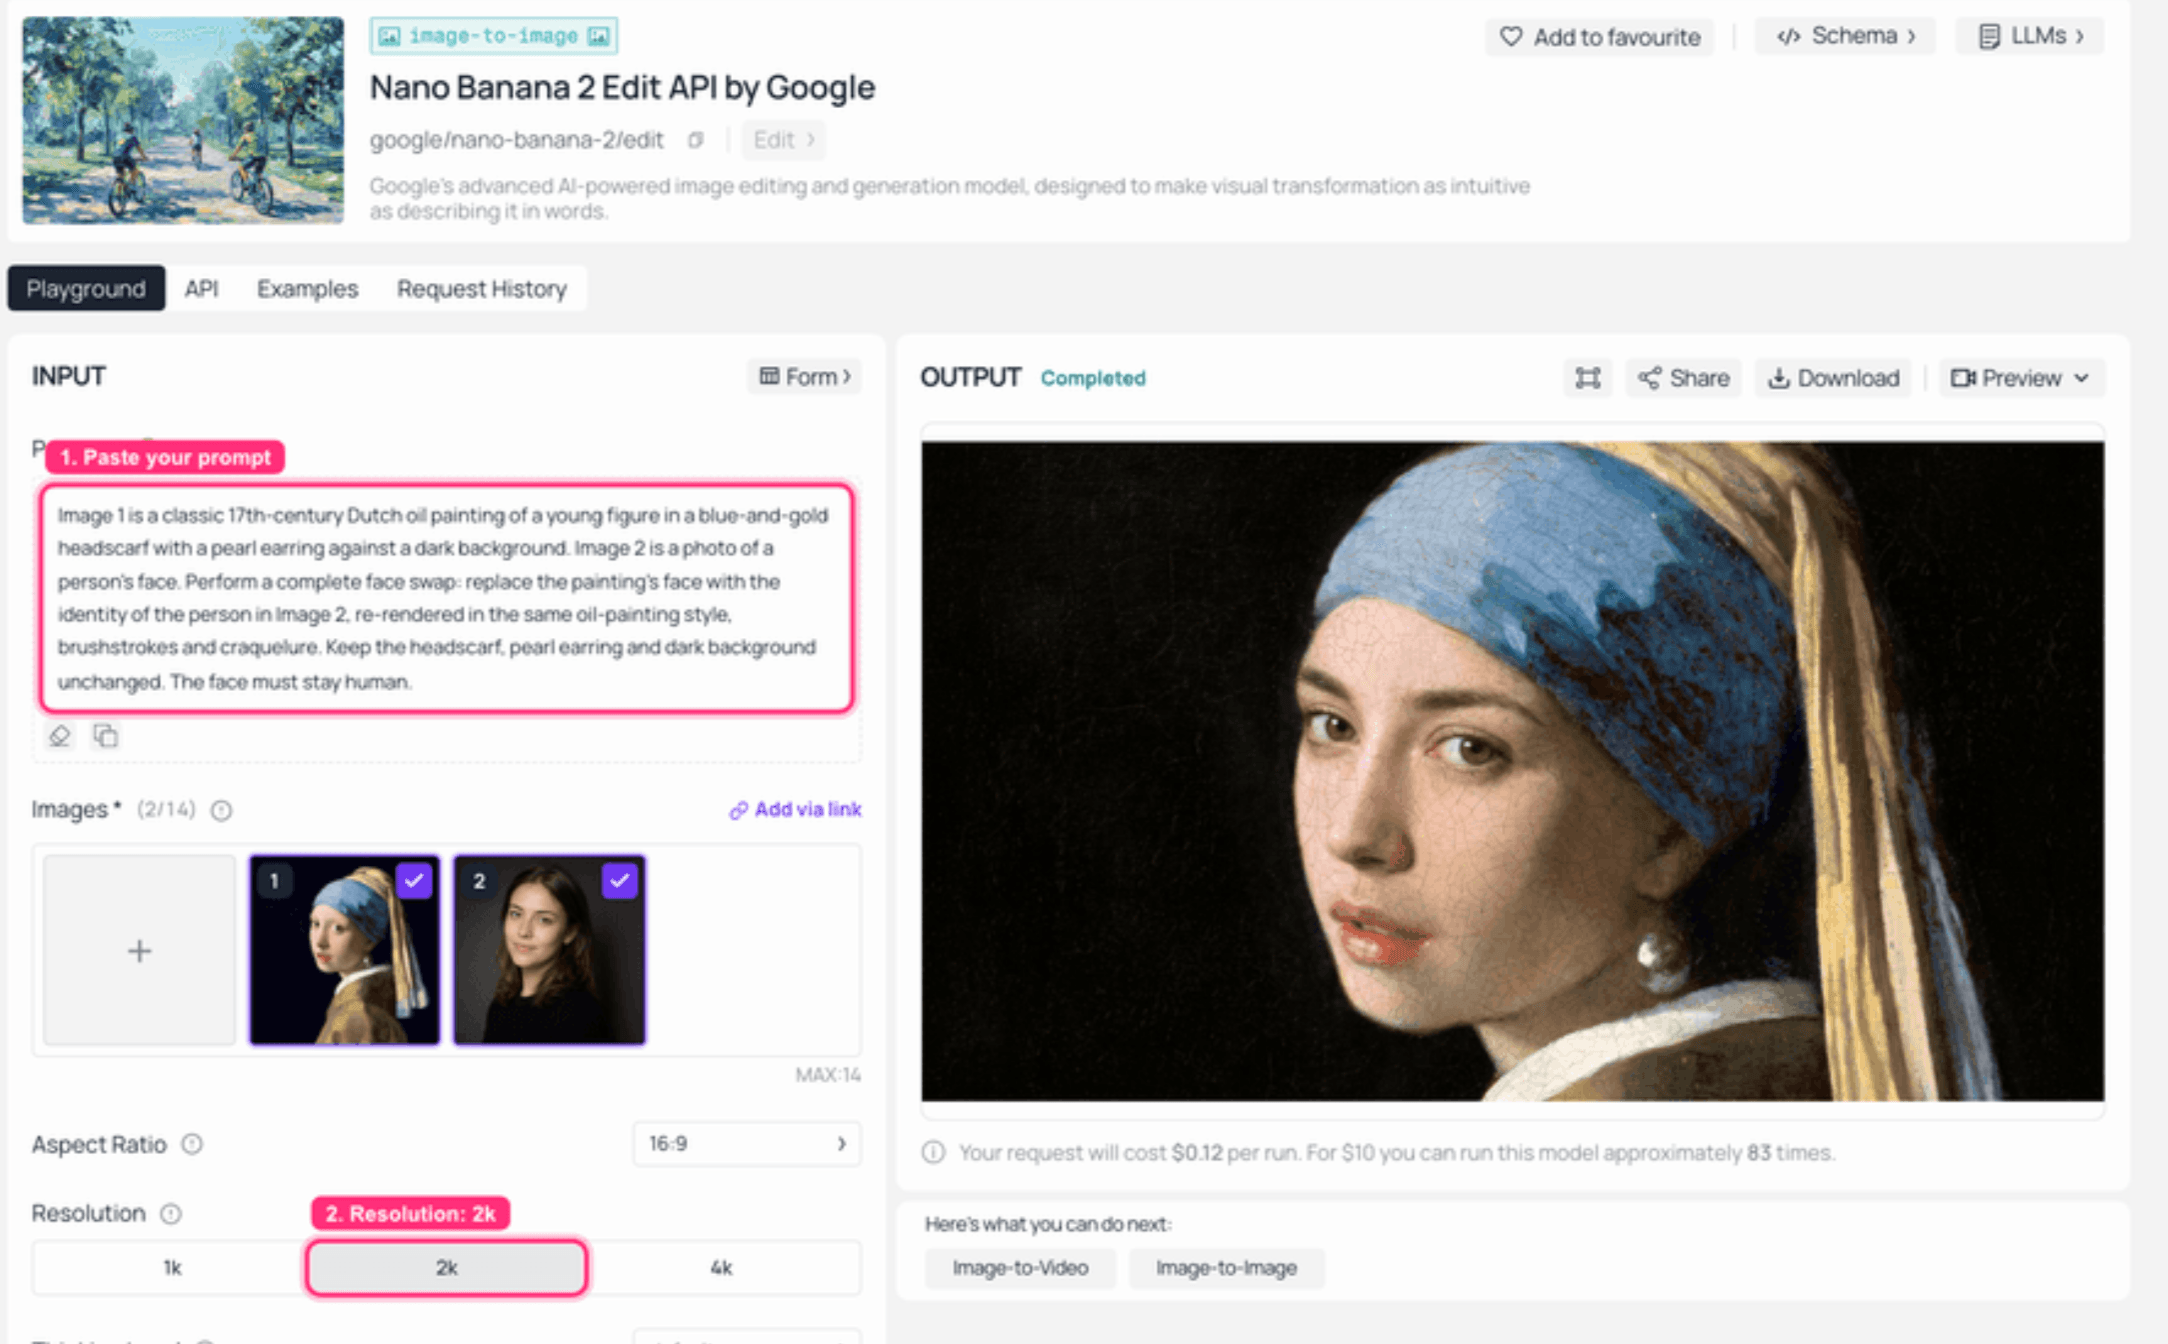 Nano Banana 2 Edit on Atlas Cloud: both reference images loaded on the left, the fused oil-painting result rendered on the right
Step 3: Finish in Photoshop (the pro 10%). Bring the fused result back into Photoshop. Now you do only the polish: nudge the last bit of skin tone with Curves or Selective Color, unify the light with dodge and burn, heal any faint seam with the Healing Brush, add a touch of noise/grain so it matches the canvas texture, and sharpen the eyes just enough to kill any glassiness. If you stacked layers, Edit ▸ Auto-Blend Layers with Seamless Tones and Colors is a good final pass. This is the part manual editors spend two hours on. Here it takes a few minutes because the fusion already did the heavy lifting. 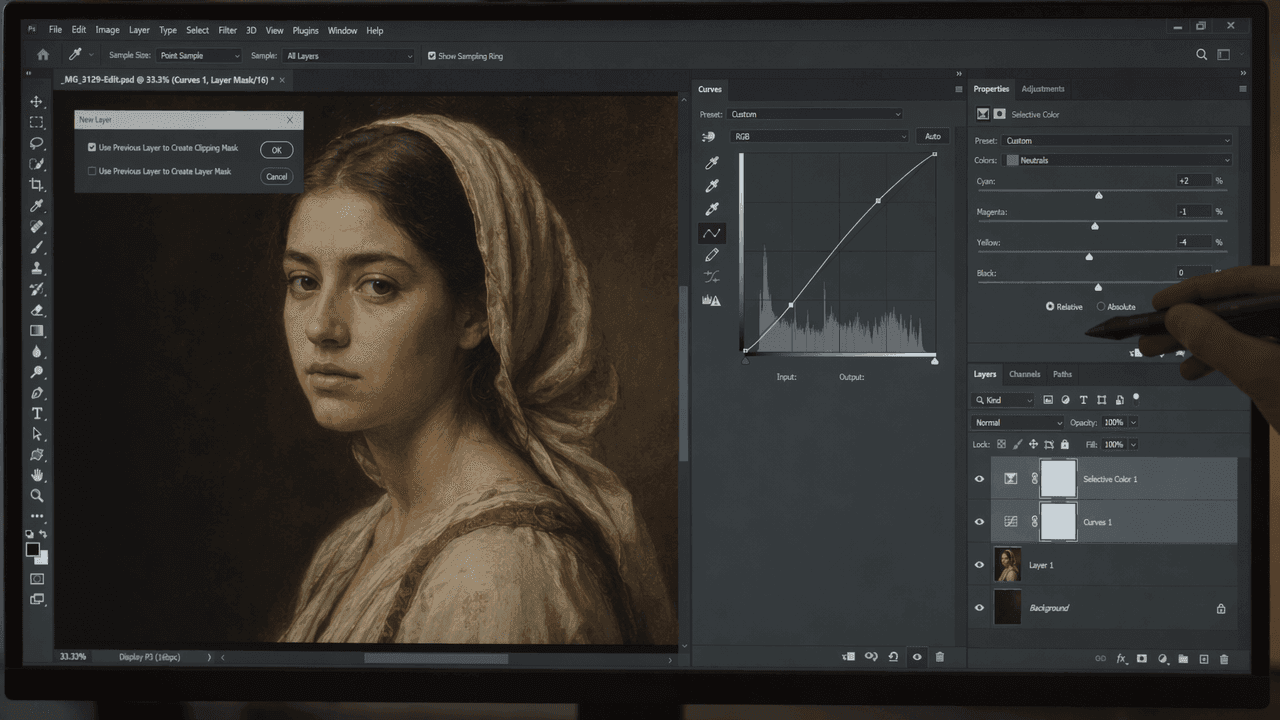 A Photoshop adjustment-layers panel with Curves and Selective Color open over the fused portrait, and the Auto-Blend Layers dialog with Seamless Tones and Colors checked (illustrative)
Step 4: Bring the portrait to life. Take the finished still and open bytedance/seedance-2.0-mini/image-to-video. Set the image to your fused portrait, pick 720p, and a 5-second duration. This is the 2026 living-portrait trend that museums and photographers have picked up. Paste this prompt:
plaintext1A living portrait. The subject in this oil painting slowly comes to life: one 2soft, natural blink, the faintest breath, an almost imperceptible turn of the 3head toward the viewer, eyes catching the light. Preserve the oil-painting 4texture, brushstrokes and warm gallery lighting; locked-off camera, still 5background, cinematic and subtle, no exaggerated movement.
Settings: 720p, 5 seconds, ratio matched to the painting. Keep the motion subtle. The magic is that it still looks like a painting that happens to breathe, not a cartoon. 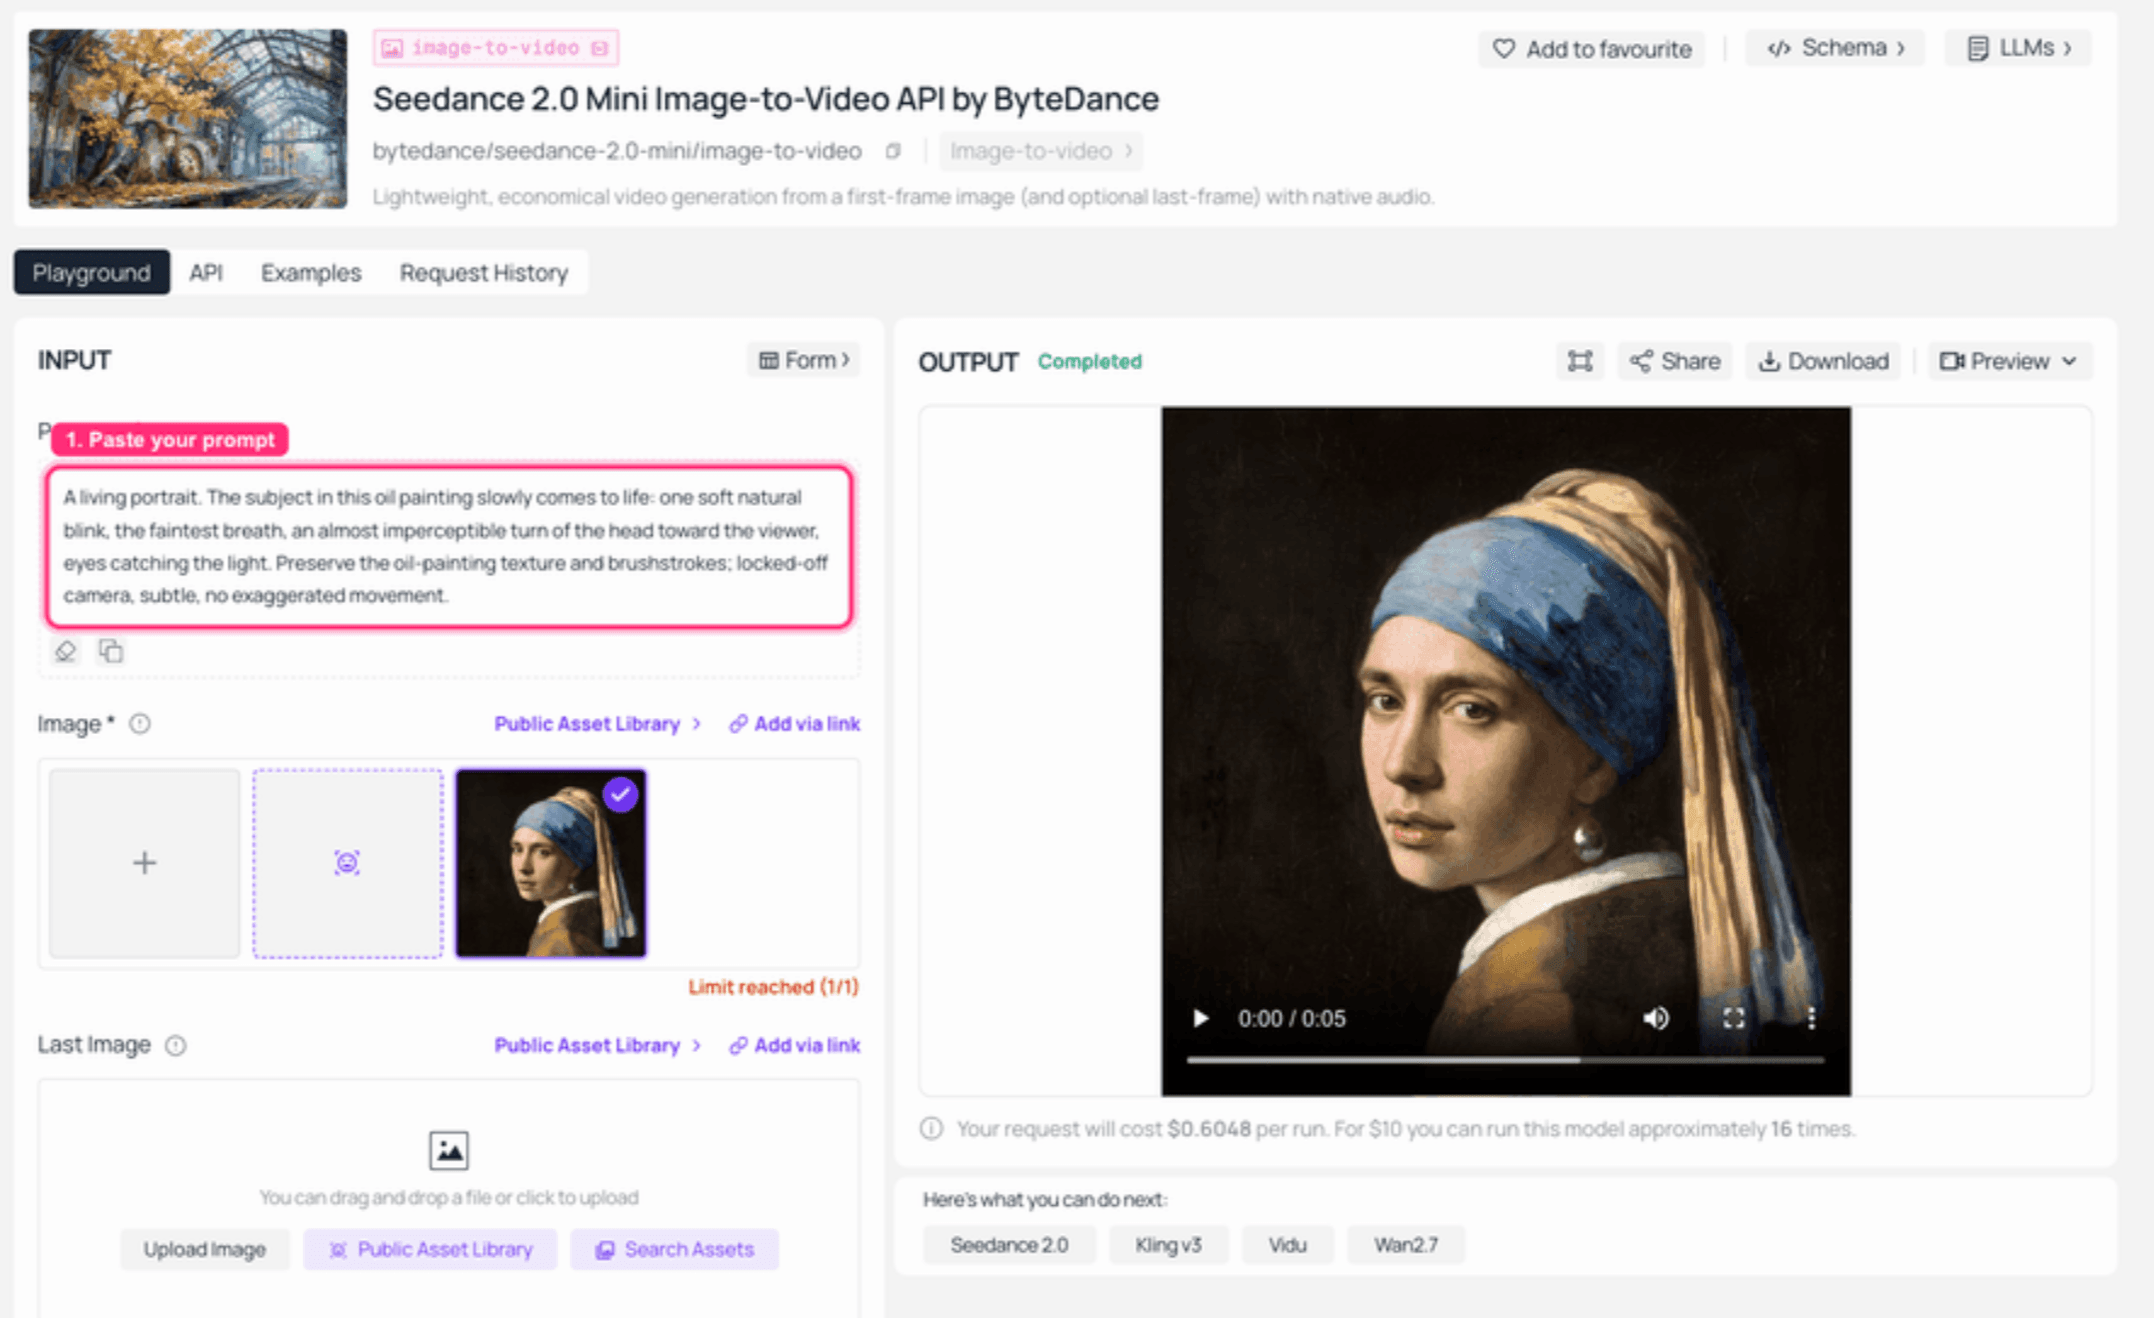 Seedance 2.0 Mini image-to-video on Atlas Cloud: the fused portrait loaded as the input frame, the finished 5-second clip playing in the output panel
Step 5: Turn the video into a shareable GIF. Atlas Cloud hands you an MP4, not a GIF. To get a clean, looping GIF for social, pass the video to any LLM that can run code (Claude, ChatGPT, or Atlas Cloud's LLM API) with this prompt:
plaintext1Here is a 5-second MP4 (attached / at <URL>). Convert it into a high-quality, 2infinitely-looping GIF under 5 MB for web and social. Use ffmpeg with a two-pass 3palettegen/paletteuse: first generate a palette, then apply it at ~480px width, 412 fps, with dithering, so the colors stay clean and the oil-painting texture is 5preserved. Return the exact ffmpeg commands and the final .gif.
If you would rather run it yourself, the two-pass ffmpeg recipe is short:
plaintext1ffmpeg -i in.mp4 -vf "fps=12,scale=480:-1,palettegen=max_colors=128" palette.png 2ffmpeg -i in.mp4 -i palette.png -lavfi "fps=12,scale=480:-1,paletteuse=dither=bayer" -loop 0 out.gif
And here is the final result: a 400-year-old painting, a brand new face, blinking and breathing on a loop. 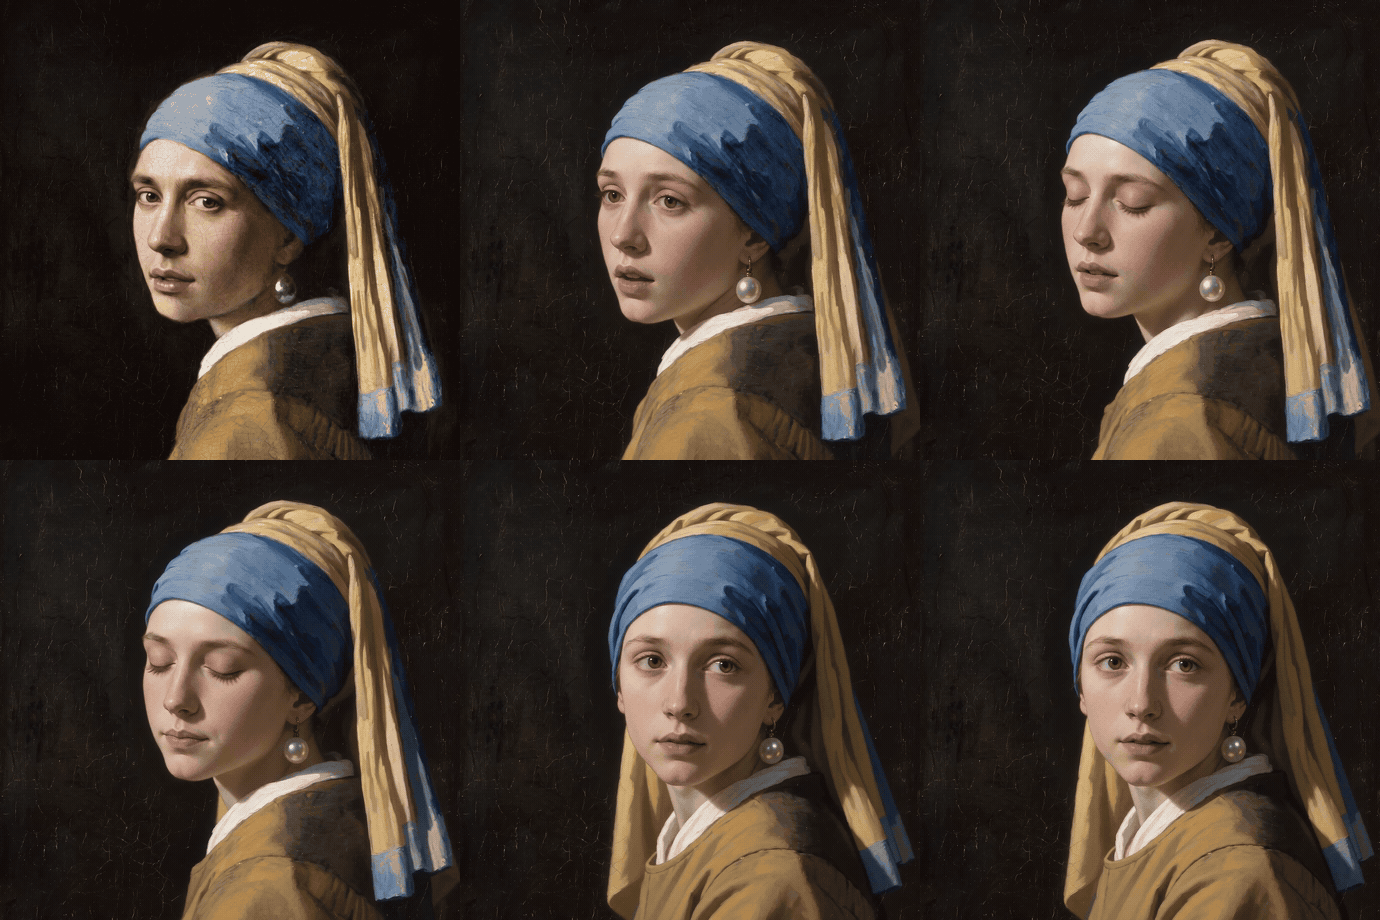 The finished living-portrait GIF: the swapped-face Vermeer painting blinking and breathing subtly on a loop
INRmWve2HVk
More Photoshop Face Swap Variations to Try
The painting was the hard mode. The same workflow handles cleaner cases with even less effort.
- Photo into a real portrait. Want to put your own face into a crisp photograph (say, an official-looking studio portrait) instead of a painting? That job belongs to the free Swap Face tool covered just below. It preserves the original composition and transfers a real identity, rather than re-rendering the whole scene, and it costs nothing.
- Magazine-cover studio look. Start with a clean studio portrait as the base and the result reads like a real cover shoot.
- Batch or multi-face. Swapping several faces in one frame? Run each face as its own pass rather than asking one edit to juggle two people, then composite.
Which model for which job:
| Model | Best for | What it does to the image |
|---|---|---|
| nano-banana-2/edit | Fusing a face into a painting or stylized art | Re-renders the face in the source style, keeps texture and grain |
| seedream-v5.0-pro/edit | You want a clean, HD-photo look | Tends to "beautify" into a polished photo, loses painterly texture |
| Swap Face tool | Exact identity onto a real photo | Keeps composition, transfers the real person's face, at no charge |
From a Few Cents to Zero: The Free Swap Face Tool
Every price in this article so far has been a few cents. For a straight swap, it can be zero. Atlas Cloud's free AI face swap answers the money question in its own FAQ with a plain yes: it is free, there is no usage cap, and no watermark lands on the output. There is no prompt to write either. It takes exactly two uploads, a target image and a face photo, maps 468 facial points, and returns the swap in about eight seconds. Two sliders replace the seam fight: Blend sets how strongly the new face takes, and Feather controls how softly its edges melt into the surrounding pixels.
It sits on the other side of the fusion-versus-paste divide this article keeps drawing, in a third spot the manual paste never reaches: it transfers the exact identity and keeps the target's composition, instead of re-rendering the scene the way the Step 2 prompt does. That makes it the finish line for the photo cases above, the studio portrait and the magazine cover, and a free first pass on hard mode. Rerun this article's own pairing to see it: load the Vermeer as the target image and the Step 1 portrait photo as the face, hit Swap, and eight seconds later you know exactly how that identity sits in the painting's framing, before the meter has moved once. The oil-paint re-render stays Step 2's job; the free swap tells you whether the pairing works at all, and on photo targets it simply is the job.
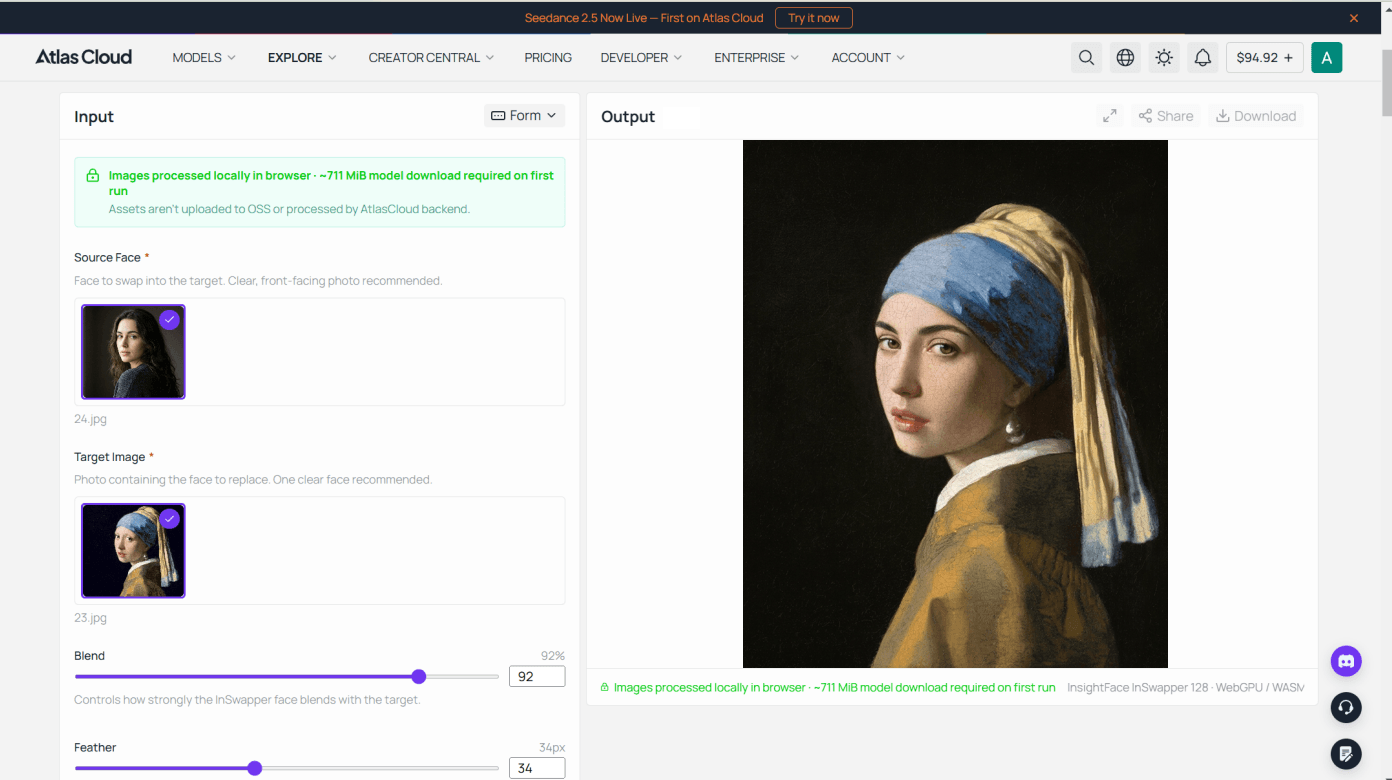
The honest boundaries: results download as PNG at the size of your target photo up to 1280 pixels on the longest side (the 2K fusion route goes higher), swaps run one photo at a time with no batch upload, and the first visit fetches about 711 MiB of model files before the first swap. It also stops at stills. When the result needs to blink, hand it to Step 4's Seedance flow like any other frame.
What a Photoshop Face Swap Actually Costs
The honest comparison is not free versus paid, it is your afternoon versus a few cents. And since the Swap Face tool above handles straight photo swaps at no charge, the few cents only apply when you want the painterly fusion or the video.
| Manual Photoshop | AI-assisted hybrid | |
|---|---|---|
| Steps | ~10 | 2 (fuse, then finish) |
| Time per face | 30 min to 2 hours | Seconds for the fusion, minutes to polish |
| Skin tone and lighting | Manual, fiddly | Handled by the model |
| Your own reference face | Yes | Yes |
| Turn it into video/GIF | No | Yes |
| Cost | Creative Cloud subscription + time | Under a dollar for a fused still plus a 5s clip |
You still need Photoshop for the polish and for full creative control. But the part that used to eat your afternoon now costs less than a coffee and finishes before you have refilled it.
Is Face Swapping Legal? A Quick Note
Short version: swap your own face, public-domain art, or a face you have permission to use, and you are fine. That is exactly why this tutorial used a 1665 painting and a generated portrait. Putting a real person's face somewhere without consent is a different matter, touching on likeness rights and a growing set of deepfake laws. It is not a hypothetical problem either. Deepfakes made up 7% of all fraud attempts in 2024, a four-fold jump from the year before (Sumsub, 2024). Use the tech for art, restoration and fun, not for passing something off as real. Atlas Cloud also blocks sensitive swaps, including anything involving minors.
Frequently Asked Questions
How do I swap faces in Photoshop step by step?
The manual route: Lasso the source face and paste it over the target face on a new layer, use Free Transform and Warp to align the eyes and mouth, add a layer mask, load the underlying body layer as a selection and contract it by about 5 pixels, run Edit ▸ Auto-Blend Layers with Seamless Tones and Colors checked, then finish with Curves, Selective Color and dodge and burn. It is roughly ten steps. The faster route is to let an AI model fuse the face first, then only do the polish in Photoshop.
Can Photoshop's Generative Fill or Firefly swap in a specific person's face?
No. Generative Fill and Firefly can generate a new, invented face, but they will not take a specific face from a photo you provide, because Firefly only generates from Adobe's own trained material. This is exactly why people use an edit model that accepts your own reference photo, like running Nano Banana 2 on Atlas Cloud, for a real photoshop face swap.
How do I match skin tone and lighting so the face swap doesn't look fake?
Manually, the tools are Auto-Blend Layers (Seamless Tones and Colors), Curves, Selective Color and dodge and burn to unify the light. The faster answer is to let the fusion model match tone and lighting in one step, then only touch up in Photoshop. The two tell-tale signs of a fake are a hard edge along the jaw and a face lit from the wrong direction, so fix those first.
Is there a faster or free alternative to a manual Photoshop face swap?
Yes, on both counts. A single AI fusion does in seconds what takes 30 minutes to 2 hours by hand, and a fused still costs cents. There is also a genuinely free route: Atlas Cloud's Swap Face tool handles straight photo swaps at no charge, with no usage cap and no watermark per its own FAQ. Either way, you keep Photoshop for the creative polish, and the hybrid workflow stays faster, more realistic, and cheaper in time than doing the whole thing manually.
Can I turn my Photoshop face swap into a video or GIF?
Yes, and it is the fun part. Feed the finished still into an image-to-video model (like Seedance 2.0 Mini) to get a short living-portrait clip, then convert that MP4 to a looping GIF with a two-pass ffmpeg palettegen. The article above has the exact prompts and the ffmpeg commands.
How do I swap faces in Photoshop while keeping an oil-painting look?
This is where fusion beats pasting. Use an edit model and tell it explicitly to re-render the new face in the source style: same lighting, same brushstrokes, same canvas texture and craquelure. If you paste a photo face onto a painting and leave it there, it will always read as a sticker. The face swap in photoshop only looks right when the new face is rebuilt in paint, which is exactly what the Step 2 prompt forces.